 Everyone loves a handmade gift, and it's a great way to get children involved with the gift giving process. Little ones don't have much concept of shopping, or choosing gifts for important relatives, so a gift they have made is something that they can personally be a part of. Two problems often arise with crafts though: they can be time consuming and surprisingly expensive. In this post I have some ideas of gifts you can make with household items that won't break the bank, take ages, or make a crazy amount of mess. If you're having a last minute panic about gifts from your children, this might just be the answer!
Toilet Roll Pencil Pot
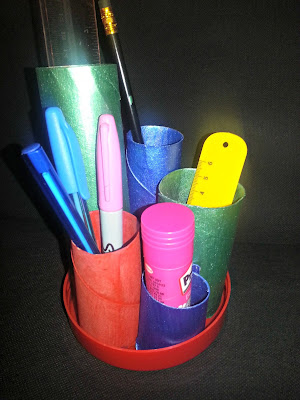
All you need for this craft are five differently sized toilet roll tubes, a large lid, some paint and a little sellotape. It helps to have a kitchen roll tube, so that you get a variety of heights, then trim them so they are all different. We used the lid from a tub of marshmallows.
First, paint all the different sized tubes. We used a basic poster paint and chose dark colours, so it wouldn't need such a thick layer and would dry a bit quicker. You can paint the insides and outsides at the same time, but it's quite messy, so if you can spare the time, let the inside dry first. Once the tubes are totally dry, arrange them in the upturned lid. You may need more or less, depending on the size of your lid. You ideally want to squish them in a bit, so they are quite a tight fit. Use a small amount of tape, to secure them to the base. That's all there is to it, the perfect gift for the messy desk owner in your family!
Travel Pencil Pot
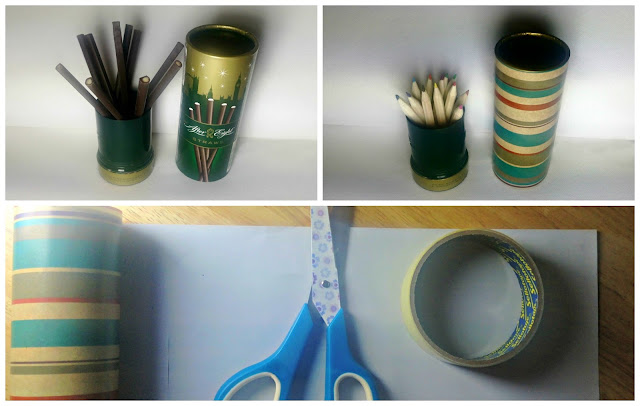
These After Eight Straws are really delicious. We found this out while trying to take the 'before' photos, so you may notice the pot is a bit light on straws. Can I just reassure you, that if you do happen to buy some, there will be a potful, honest. At least to begin with, anyway! Anyway, it turns out that these little pots are the perfect size for small colouring pencils or crayons, so it's really easy to make a lovely pencil pot, with a handy lid for colouring-based travels. The quickest way, is to cut a strip of wrapping paper slightly longer than the tube lid, then wrap it carefully round, securing with double sided tape. The paper needs to be level with the top of the lid with the overhang at the bottom, so that you can tuck it under and secure it with tape. If you have more time, or are feeling adventurous, you could draw a design onto coloured paper, or use stickers to decorate.
Matchbox Trinket Drawers
You remember those big boxes of matches that lived in every kitchen in the eighties? You don't? Not as old as me? Ok, moving on. They still exist and they are great for craft projects! In this hastily constructed effort, we've used three to make a little set of drawers, perfect for jewellery, or those small precious items that children like to feed to the vacuum cleaner. All you need to do to make it, is carefully arrange three boxes in a stack and sellotape them together, then cover with some pretty paper (or make you own, for an even more personal gift). To make the handles, fold a small length of ribbon in half and sellotape to the inside of the box. I rushed mine a bit, but if you had a bit longer, you could probably do a better job!
Doily Angel
We bought a big pack of doilies in a pound shop, or you may already have one or two, left over from a nineteenth century afternoon tea party. You can also use a paper plate, to create a similar effect. I used two doilies together, to make the finished article a bit more robust, but a single one should still stand up. Just cut the wing shape and head out, as shown and cut two slits either side, exactly as they are in the picture. Once you have done this, place the side with the long slit over the shorter side, to maike a cone, and slot the long slit into the shorter one. Rest assured, your face will be miles better than mine, I can't draw faces!


No comments
Post a Comment